
Welcome! If you need help setting up your FX Luminaire slat wall display, you have come to the right spot. Here, you will find detailed instructions and videos about how to set up your display, which displays to use for which products, graphics for your displays, and more. Questions? Email MarketingServices@hunterindustries.com
LITERATURE AND SIGNAGE
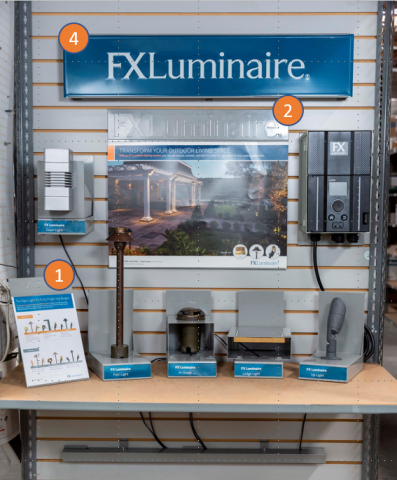
The FX Luminaire slat wall displays come with a variety of options for literature holders and signage. The flyer, poster, and brochure displays are shelf and slat wall display compatible. Use the easel on the back of the display to prop up on a counter or shelf.
- 8.5 x 11 flyer sign or an A4 flyer sign (for International markets)
- 24 x 17 poster holder
- Tri-fold brochure holder (4.375" x 8.25")
- Metal branded sign (36" x 8")
PRODUCT DISPLAYS
There are a variety of product display options you can choose from. All the displays are shelf and slat wall display compatible.
With the FX Luminaire slat wall displays, there is a main shelf that can house a variety of different fixtures. The main shelf can display fixtures with a ½ thread with the correct mounting attachments. All Up lights with a ½ thread can be mounted to displays with the mini mount. All Path Lights with a ½ thread can be mounted to the display with a versa Additionally, there are plates for specific products that can be attached to the main shelf to increase the amount options you have!
TOOLS REQUIRED
- 2.5 Allen Wrench or T15 screwdriver
- Pliers
- Wrench
MAIN SHELF FIXTURE OPTIONS
- Up Lights with ½ thread and a Mini Mount
- Path Light with ½ thread and Versa Box
All the plate options are attachments to the main shelf. You MUST order a shelf when ordering any of the plates. The shelf doesn’t come with the plate.
PLATE OPTIONS
- MO Wall Light Plate
- NL Down Light Plate (Both Designs)
- PM Path Light Plate
- QL Down Light Plate
- In-Grade Light Plate
- FC
- C-IN
- Ledge Light Plate
- LF
- C-LL
- Modern Path Light Plate
- M-PL
- M-PK
- Pendant Light Plate
- VE
- LE
- LS
- PS
- Down Light Plate with Tree Box or Mini Mount
- C-DL
- DE
- JB
- MD
- QT
UP LIGHTS DIRECTIONS
- Attach the mini mount to the fixture (if not already, attached)
- Feed the wire through the hole in the center of the shelf and then through to the hole on the bottom back of the shelf.
- Align the holes in the center of the shelf with the holes of the mini mount and screw the fixture in.
- Secure with lug nuts on the bottom of the shelf
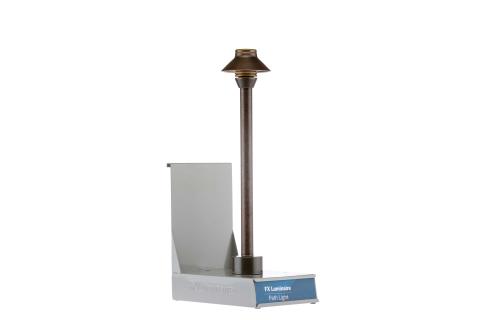
PATH LIGHT DIRECTIONS
- Unscrew Versa box
- Screw bottom of versa box to the shelf
- Secure screw with lug nuts from the bottom of the self
- Screw top part of versa box together again
- Pull wire through the versa box and through shelf back hole
- Twist path light into Versa box
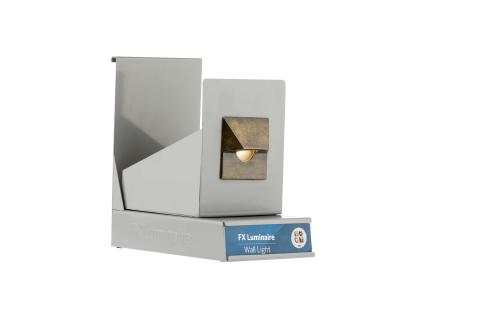
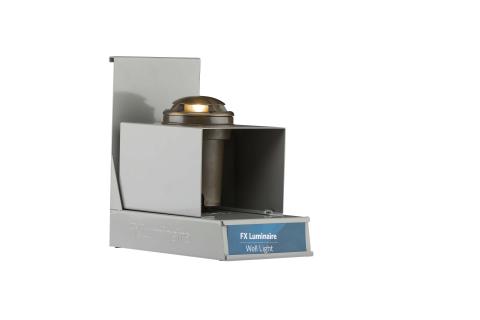
MO WALL PLATE DIRECTIONS
- Align the plate with the holes in the corner of the shelf.
- Screw the shelves from the bottom to the top
- Place fixture in the hole
- Feed the wire through the hole on top of the shelf then feed it through to hole on the bottom back of the shelf
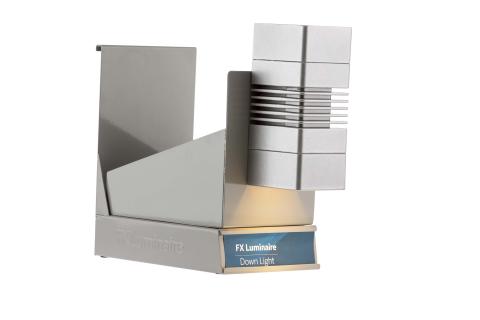

NL DOWN LIGHT PLATE (BOTH DESIGNS)
- Take the plate and line the holes with holes on the shelf
- Screw-in from the bottom to the top
- Take the NL fixture and unscrew the bracket
- Screw the bracket onto the front of the shelf
- Feed the wire through the hole on the plate then through the back hole of the shelf and out the bottom hole
- Slide the fixture onto the bracket to secure

PM PATH LIGHT PLATE
- Unscrew bracket from the fixture
- Secure bracket to the plate
- Feed fixture wire through the hole in the plate
- Snap Fixture onto the bracket
- Feed the wire through the hole in the center of the shelf
- Align the holes of the plate with the holes on the shelf
- Screw the plate to the shelf
- Feed the wire through to the hole on the bottom back of the shelf.
QL DOWN LIGHT PLATE
- Take the plate and line the holes with the two-front hole on the shelf
- Screw-in from the top down
- Take the QL fixture and unscrew the bracket
- Put two screws through the bracket then re-attach to the fixture
- Place the screws through the plate and secure the fixture with hex nuts
- Feed the wire through the hole on the plate then through the center hole of the shelf and out the bottom hole
- Click the fixture onto the bracket to secure
IN-GRADE LIGHT PLATE DIRECTIONS
- This plate will have screws already attached to it. Align the plate screws with the holes in the four corners of the shelf.
- Secure the plate to the shelf with hex nuts
- Place fixture in the hole
- Feed the wire through the hole on top of the shelf then feed it through to hole on the bottom back of the shelf
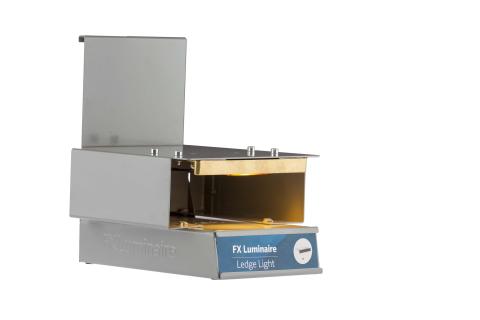
LEDGE LIGHT PLATE
- Align the bracket holes with the hole on top of the plate and attach the fixture to the plate. Screw from the top.
- This plate will have screws already attached to it. Align the plate screws with the holes in the four corners of the shelf.
- Secure with lug nuts
- Feed the wire through the hole in the back of the shelf and then through to the hole on the bottom back of the shelf.
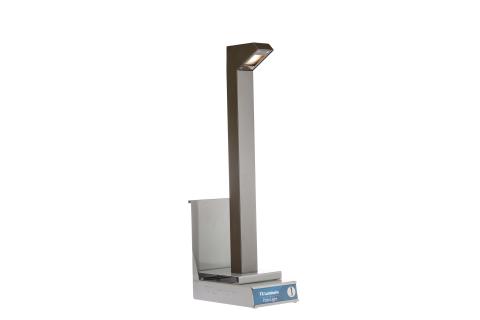
MODERN PATH LIGHT PLATE DIRECTIONS
- Unscrew bracket from the fixture
- Secure bracket to the plate
- Feed fixture wire through the hole in the plate
- Snap Fixture onto the bracket
- Feed the wire through the hole in the center of the shelf
- Align the holes of the plate with the holes on the shelf
- Screw the plate to the shelf
- Feed the wire through to the hole on the bottom back of the shelf.
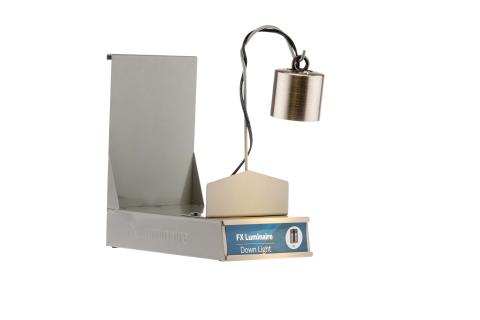
PENDANT LIGHT PLATE DIRECTIONS
- This plate will have screws already attached to it. Align the plate screws with the two holes in the front.
- Secure the plate to the shelf with hex nuts
- Feed the wire through the hole in the center of the shelf and then through to the hole on the bottom back of the shelf.
- Hang the fixture from the hook.
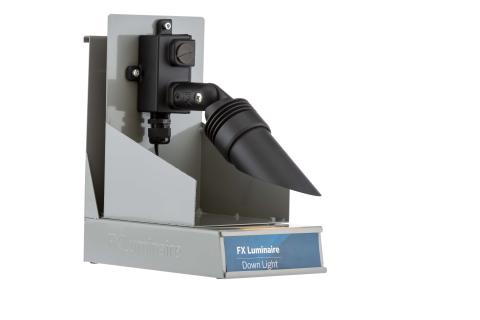
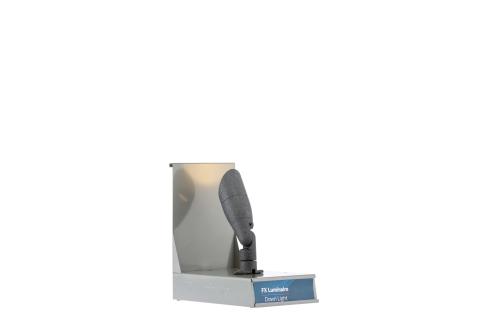
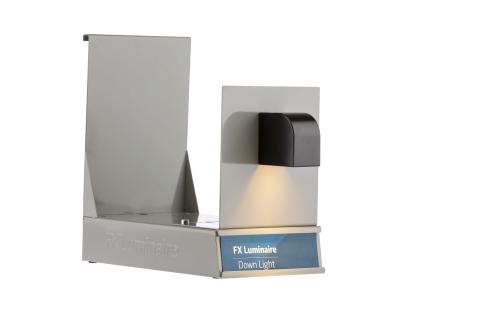
DOWN LIGHT PLATE DIRECTIONS
- If you are using a tree mount, attach the fixture with the mount to the plate first! It is difficult to attach the fixture after the plate has been attached to the shelf. It is easier to do this step first.
- Align the holes of the plate with the holes on the shelf
- Screw the plate to the shelf
- Feed the wire through the hole in the back of the shelf and then through to the hole on the bottom back of the shelf.
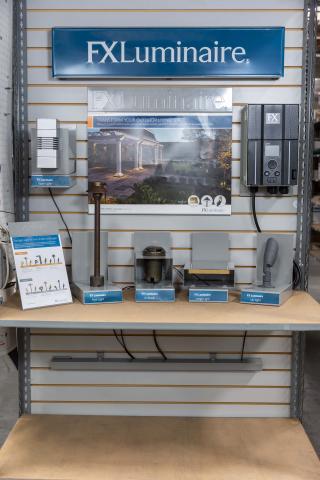
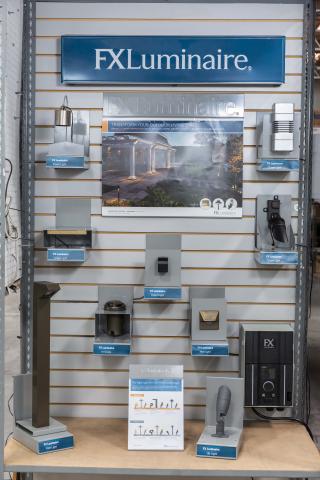
PLANOGRAM EXAMPLES
Important Information for Hunter Sales Managers
Please review all the instructions before placing your orders to ensure that you have all the materials necessary to properly set up your display.
ORDERING INFORMATION
- To order an FX Luminaire Slat Wal display, please visit the Hunter Product Display store.
- To order an FX Luminaire Slat Wall display flyers, posters, and ticket strips, please visit the Literature Marketplace.
- To order products for the displays, please reach out to your customer service representative.
- Questions? Email MarketingServices@hunterindustries.com.
TIPS FOR ORDERING AND SET-UP
- Visit the branch and review the space where is displays are going. Be sure that you have enough room for everything that you are ordering.
- Once you have ordered all the materials and have had the display sent to the branch, we recommend blocking off a day to set up the display at the branch. Depending on how many shelves and signs you order, setting up the displays is time-consuming.
- Bring your tool bag. The displays will require a screwdriver and a Hex Key Allen Wrench for set-up. The shelves will come with a little tool kit that contains the screws and a Hex Key Allen Wrench the display needs. We recommend you bring your own tools for a quicker, easier setup.
GET STARTED!
- Place your order for the Slat Wall Display shelves, signs, flyer & poster holders, for the branch through the Product Display Store
- For Controller display or Product displays, please be sure you order a hardware kit too. This will have materials required during setup.
- Don't forget your graphics! Order the graphics for the display from the Literature Marketplace.
- Get products for your displays by ordering from your Customer Service rep.